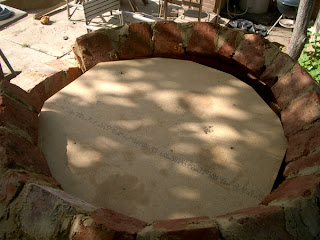
I laid the first course of bricks for the dome, following
the circumference I’d marked on the oven floor in yellow pencil (see Part I).
The first course began and ended at the edges of the steel arch. Once I’d laid
the first course, I bricked in the arch, then continued with the dome.
Getting each course to fit snugly where it meets the arch
proved a bit of a challenge, especially the course that runs across the top of
the arch.
Basically it came down to patching the gaps as best I could by
cutting bricks to size or using off-cuts etc. A big slather of mortar covers a
multitude of brick-laying sins, too, I discovered!
Using the pivoting cradle I’d made (see Part I), I checked
the position of each subsequent course of bricks before setting them in place.
The correct angle can be achieved by sitting the half bricks on a little wedge
of mortar. I tried to keep the inside edges of the bricks touching, which
creates another little wedge shaped space on the outer face. This space can be
filled with mortar.
The dome took shape quite quickly – much to my delight! It
also held together fairly well, too. But there comes a point where the
steepness of the dome proves too much for the bricks to stay in place without
support – once complete, the dome is self-supporting, but the final few courses
need to be held up until all the bricks are in place and the mortar has set.
Here’s how I did it…
First of all I set up a sturdy board on top of some supports
inside the oven, virtually plugging the open space at the top of the dome.
With this basic support in place, I plugged the remaining
gaps with newspaper, then covered the whole thing with sand, which I sculpted
by hand to form a kind of frame for the remaining bricks.
As you can see, for the internal supports I used some old bessa blocks – BAD IDEA!
Once the dome is complete you’ll need to be able to remove whatever setup you
arrange for this – the only way I could get the bessa blocks out was by
smashing them with a crowbar, which nearly destroyed the dome itself! I suggest
you use cardboard boxes or some timber off cuts, both of which can be sawn or
even burned.
Near the top of the dome, things don’t quite fit as neatly and easily as elsewhere – you’ll need to cut bricks to plug the opening as simply and thoroughly as possible. Don’t skimp, however, or your dome won’t support its own weight! Fill as many of the gaps as possible with wedges of brick, rather than mortar.
I finished off the top of the dome with a healthy slather of
mortar, and that was more or less it – see…
So the dome was complete, but of course not quite, as it
still needed some kind of chimney, and a whole lot of insulation. Stay tuned
for details!
THE END


We'll done, much harder than it looks!
ReplyDeleteYou're right Fergus - the last part especially. But satisfying.
ReplyDeleteIs this regular cement or refractory?
ReplyDelete